We can’t talk about translucent clay without checking to see what Kathrin Neumeier is up to, teasing us with another series of her glass-like earrings. She uses Pardo clay with inks to create patterns and achieve light catching effects.
If I’m not mistaken, the red earrings in her recent photos have burn spots on them. While it’s a controlled burn and the effects look purposeful, Kathrin is obviously testing the limits of translucent polymer. She’s on the edge and way ahead of most of us.
Illinois’ Marji Purcell lets the light shine through the kaleidoscopic canes she made using Carol Simmons’ technique. (Here she is learning Carol’s process.)
For her own version, she uses Premo translucent in each of the canes that forms the master triangle. Each component cane is wrapped in black.
As she assembles the circles, Marji varies the orientation of the slices from the master triangular cane to change the resulting circular patterns. Hanging in her window, these mandalas resemble stained glass. A while back she entered her brief translucent clay video in Polyform’s tip contest.
Looking at these calming artworks, it’s not surprising to learn that Marji is a certified meditation instructor, a retired art teacher and the owner of Sumner Street Studio in Wheaton, IL. Her story of finding her studio is one you’re sure to enjoy.
Ireland’s Silvana Bates starts our week with wrapped polymer bud beads that look fresh from the garden. With their rounded tops and sherbert colors they could almost be edible.
Silvana has only been using polymer for a year yet she’s posted an impressive gallery of pictures of her work on Facebook, Pinterest and Flickr.
Living far from other polymer artists, she’s had to develop her own methods. The birds, bugs and flowers in her garden provide ample inspiration. Don’t miss her butterfly watercolors and her hummingbirds. Silvana tweaks colors and shapes to suit herself.
Lindly Haunani has hit the color sweet spot with her latest series of brooches which she produces in a range of color blends. Mud, gold Premo and a Rolls Royce of a pasta machine have helped her along the way.
Of course a degree in printmaking, years of creating art and teaching polymer and a supreme color sense also contribute to her masterful combinations.
But back to the mud. A dollop of gray/brown clay is mixed into some colors to mute them ever so slightly. Gold added to others brings out a lovely luminosity. She mixes a 9″ x 12″ sheet of rainbow colors, tweaking it until the colors sing.
“The rest,” she says, “is a meditative process of making thin veneers, cutting them, combining them, flipping them so that dark-to-light butts against light-to-dark.” Once the patterns are assembled, she impresses them with 120-grit sandpaper to give them a soft, textile-like surface.
Lindly sold these brooches when she was teaching in Europe recently to help finance her new electric dough roller (like this one). “It’s like driving a Rolls Royce,” she admits.
You can learn some of Lindly’s color secrets in the book she and Maggie Maggio wrote. See where she’s teaching and see more of her color magic on her site and on Facebook where these brooches have started a buzz.
These colors are groovier than Eva’s usual palette and the squished spacers add another funky note. The bangles have a flower child/ summer of love vibe that’s new for this Prague artist.
Eva tells the story of her move to polymer art in my book. She’s got a great eye, impeccable skills and she’s ready to teach. See more on her site and Facebook.
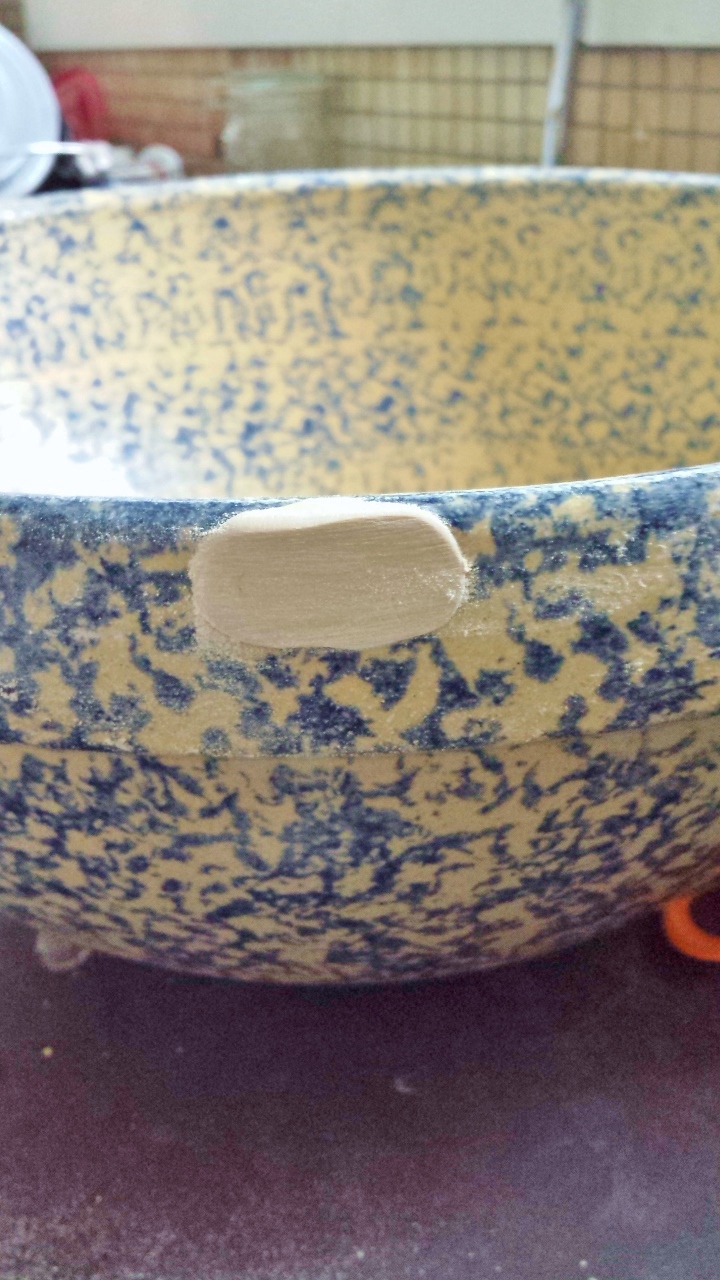
Luann Udell made a discovery as she prepared for her big cross-country move. Treasures can bang and bump and break. A chip in this antique Roseville pottery bowl made her sad and she resolved to save it with polymer. She details her method in this free tutorial that contains some surprises. Bake the polymer first? Use an adhesive activator? These are tricks you won’t find anywhere else.
If you’ve ever fretted over a chipped tile or a cracked pot, you’ll thank Luann for taking the time to tell you the secrets of patching with polymer. You can see the artwork that Luann’s more widely known for on her site, Facebook and her blog.
Monika Brydova of Czech Republic imagines spring flowers just about to bloom in polymer. They resemble our snowdrops.
Four slim petals are textured on the inside with brighter colors on the outside. They’re joined at the top and wrapped with what looks like wire but it’s polymer too. Nestled inside the petals a yellow stamen adds contrast.
Start your week with an easy bead from from Israel’s Hila Bushari. Her spotted beads are easy on the eyes and easy to do. And she adds a free video in case you need a how-to.
A second version of her simple bead is made even more striking by rolling, shaping and texturing. Dots are all the rage in fashion this season and these snappy colors are good for spring.
Imagine my surprise when I picked these beads for today and then found that the artist, Kathy Richardson of Cincinnati, Ohio, had recently taken a class from Leslie Blackford (she was yesterday’s inspiration). Let’s call it great minds thinking alike.
Kathy was already a committed boho style, urban grunge, mixed media kinda gal. Leslie pushed Kathy to think about sculpture for her Out of Time Designs. The double entendre of her shop name makes you think, doesn’t it?
The polymer beads at the left are from another time when children played with wooden toys instead of video games. She applied colors, sanded and colored them again to give them the worn look of old toys. Peeling bark was the inspiration for the curled beads at the right.
Kathy says, “My shop started from a need to pay for this terribly addictive habit of making things to make people smile, make me smile and make the world a bit brighter in the process.” Take your time and smile as you look at her work this weekend.
While I can’t begin to channel Leslie’s wonderfully weird vision, I couldn’t wait to try making mini-me dolls for my grandsons. Leslie taught me that first you make a head using an easy photo transfer (with water and a laser print) and then you model a body and embellish it with abandon.
I hope that my first clumsy attempt at photo transfer sculpture won’t scare my lovely toddlers. Not great art but I had great fun in the studio.