Colorado’s Jainnie Jenkins gives her polymer beads a spring twist. She coats the solid colored clay with mica powders which are scrubbed off after baking to give the quirky shapes more depth and dimension.
Jainnie usually appliques and textures small pieces onto polymer. This shape represents new growth! Spring blooms in unexpected places this week.
Pennsylvania outdoor girl Lynn Lunger (UnaOdd) offers the processes she’s developed for making the deep molds that form her signature Rustic Nature Polymer Pendants.
Her free tutorial shows you the tools you’ll need to make what she calls her ugly molds. It details every step with photographs.
Spring blossoms and budding plants take on new life. See where she finds inspiration and examine more of her finished work on her Flickr page.
You may prefer to bypass mold-making and shop for one of the pendants on her Etsy site. Either way we owe Lynn a big thank you for her generosity in sharing her tips and tricks with us. Nice to start the week with a cool freebie.
This month polymer pieces from Italy’s Ariane Freisleben (Magic Toscana), Canada’s Rebecca Geoffrey, and Virginia’s Page McNall show some new variations on crackling and crazing over polymer patterns. Previously crazing came from a layer of heavy paint that cracked to show the underneath color in the crevices. The results looked good but had limited application.
Newer methods allow artists to show dark cracks while revealing the caned, inked, printed or blended designs underneath. Ariane and Rebecca both mention Tina Holden’s tutorial as their starting point and Page is probably using something similar. Some clever new twists are taking hold and I see a craze craze starting.
The polymer scrap from a guild challenge provided San Antonio’s Deb Tuchsen with a rainbow of leftovers. She stacked and spiraled them into a Kato-style cane. The end bits were layered into a Stroppel-inspired log.
The synergy of the techniques and colors added up to a Van Gogh-meets-Hundertwasser cuff! This art history lesson comes to you courtesy of equal parts serendipity, sharing and skill. Congrats to Deb for bringing it all together.
I don’t know if her entry was successful in the guild challenge but this is certainly a winner. Watch the whole process on her Flickr site.
Hot colors help Oxana Volkova (Oksoon) warm up the winter in Moscow (check out the pictures from pancake weekend). This brooch is a mix of bright felt colors with a multicolored organic growth of polymer at its center.
A similar oval brooch (below) looks like it has a bit of Stroppel cane next to felt. But the felt is faux, a texture achieved by attacking the polymer surface with a toothbrush!
Oxana includes an intriguing hollow bead experiment in her Flickr pictures. And this star is one of my favorites too. So much to look at!
Polymer artists keep telling me how important play is to their art. In interviews for my book and video chats for StudioMojo, the topic surfaces repeatedly. I squirm a bit because I know I don’t often play in the studio. I fixed that today. No deadlines or pressure! Just fun with clay.
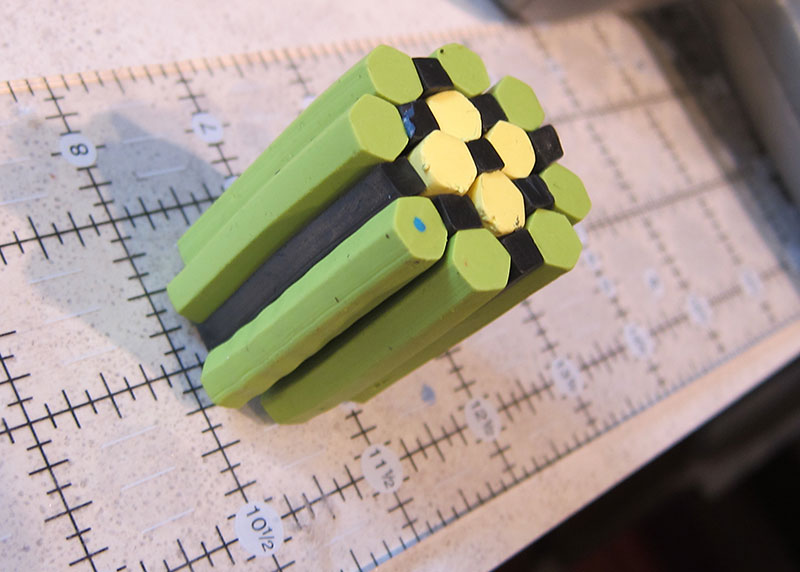
The granny squares that keep popping up online (see Lisa Clarke’s post) intrigued me. I bought this sweater to try to get over my new obsession. Rather than invest in yarn and crochet lessons, I decided to try making the squares in polymer.
The patterns improved with each cane as I improvised and experimented. While this afghan bead won’t keep me warm at night, it warms my heart to have played today…and to have shared it with you.
When you take a close look at this new Encrusted polymer bracelet from Jana Roberts Benzon are you as mesmerized as I am? The colorful texture is sumptuous and mystifying. How could you possibly make such a multi-dimensional pixel-like construction? It’s a Monday mystery.
Jana admits, “Honestly, when I finished it, I was just like dang, this is the coolest thing I’ve ever done.” More pix on Flickr and Facebook. Jana’s teaching in Philadelphia in April.
Polymer-covered pasta machine handle
Can a pasta machine handle survive the heat of the oven? Lisa Pavelka tested hers and the answer was yes. The next step, of course, was to cover it with a base layer of scrap clay and start adding cane slices.
She’ll never lose her handle in a class! Lisa’s theory is that you make better art with artistic tools.
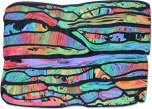
Virginia dentist, Page McNall rolled out a sheet of ecru polymer and added a few scrap clay pieces made using Maggie Maggio’s watercolor technique.
Then she colored the flat surface with alcohol inks and liquid chalks, textured it and embedded Mykonos ceramic beads for accent. She calls the resulting polymer assemblage Currents.
From this flat sheet, Page cut out pleasing shapes that became brooches and pendants. These two she calls Faux Stone Dentates (tooth-like, of course).
Her soft painterly chalks and inks are deftly applied. Page’s beautiful results may have you heading back to your inks to try again.
We all have those bits of leftover colored polymer that should be good for something, right? Rebecca Watkins has taught herself to”see” something in each ball of colorful bits and she shows you how in a few scrap to bouquet steps on her Flickr site.
When she covers the resulting carved unbaked beads with black mica they look dull and disastrous. But a light sanding of the baked bead reveals the color and brings out the pattern. She makes it look simple. Please tell me if it really is that easy. Rebecca’s recently developed a shortcut to organic stripes tutorial that you may enjoy too.
The identity of France’s Cebeka is unclear but her style is distinctive. Her various constructions take great advantage of simple canes made of subtly graduated colors. She throws in a few stripes for variety and sometimes shapes slices into teardrops for elegant dangles. Cut, repeat, manipulate is the basis for many great designs.
Simple and effective polymer techniques are catching my eye since I’ll soon be teaching artists who need to produce appealing quality items in an efficient way. Cebeka’s approach is a good strategy. Her site is full of delightful examples.


